Best RO Systems
Home › Guides › Adding an RO faucet with no spare hole
How-to

How to Add an RO Faucet to a Sink With No Spare Hole

We're reader-supported: buying through our links may earn us a commission at no extra cost to you. We compare published specifications, plumbing code basics and prices — we don't run a testing lab.

Chrome reverse osmosis faucet being fitted through a freshly drilled hole in a kitchen sink deck

The box a reverse osmosis system ships in says nothing about whether your sink has a spare hole for its faucet, and on most kitchens it doesn't. That isn't a design flaw in your sink — it's the ordinary case. Fabricators cut exactly as many holes as the original faucet needed, and nobody plans two years ahead for a filtration system they haven't bought yet.

Before you reach for a drill, it's worth ten minutes checking the sink itself. A side sprayer, a soap dispenser or a blanking cap solves this problem for a large share of installs with nothing more than a wrench. When none of those exist, the job becomes a drilling job, and which drilling job depends entirely on what the counter is made of — stainless steel, a composite sink bowl, and a slab of granite or quartz are three different afternoons with three different tools.

This guide works through finding the hole, sacrificing the right fixture, drilling each material correctly, the air-gap question your local code may or may not care about, and the seal that decides whether the new faucet ever weeps onto the cabinet floor beneath it. If you haven't installed the rest of the system yet, our guide to the storage tank and the wider install sequence are worth reading alongside this one — the faucet hole is one piece of a bigger job.

Finding a spare hole you did not know you had

Most kitchen sinks were stamped or cast with more holes than the faucet on top of them uses. Before assuming you need to drill, check these places, roughly in order of how often they turn out to be the answer:

  • The soap or lotion dispenser. The single most common spare on an American kitchen sink — a threaded pump dropped through a round hole a little over an inch across, held from below with a plastic locknut, and it comes out with nothing more than that nut and a firm pull.
  • The side sprayer. A hose-and-head unit next to the main faucet, disconnected from below by unscrewing the hose from its tee fitting. Plenty of households stopped using the sprayer years before they notice it's occupying a hole they now need.
  • The garbage disposal air switch. A small round button wired to a pneumatic switch under the sink. If your disposal is controlled by a wall switch instead, this hole may be sitting empty under a blank cap.
  • A blanking cap or knockout. Many single-hole faucets sit on a deck plate manufactured to cover a four-hole pattern. Lift the plate, or look underneath it from the cabinet, and you may find a hole that was simply never populated.
  • The faucet's own base plate. A wide oval or rectangular plate often hides a capped hole under one end, reserved for a soap dispenser or sprayer that was never bought.

If you find one of these, you've likely just turned a drilling project into a twenty-minute swap. The rest of this section only applies once you've ruled every option on that list out.

Sacrificing the soap dispenser, reversibly

Of the spares above, the soap dispenser is usually the one people give up, because it's the easiest to live without and the easiest to put back. The process is the same regardless of brand:

  • Empty the reservoir bottle and disconnect it from the pump neck, then unscrew the plastic locknut threaded onto the pump body from underneath the sink.
  • Lift the whole pump assembly out through the top of the hole. Nothing is glued or caulked under normal circumstances — a bead of old plumber's putty around the base is the only thing that might need a gentle scrape.
  • Keep every part in a labeled bag. The hole your RO faucet's deck plate needs to cover is usually close to the dispenser's own footprint, so the swap is close to invisible once the new faucet is seated.
  • If you plan to sell the house later, a stainless or chrome sink-hole blanking cap costs a few dollars and drops straight into an empty dispenser hole — cheap insurance against explaining an orphaned hole to a buyer.

This is the reason a soap dispenser is worth sacrificing before a side sprayer: it's a five-minute job with no cutting, no sealant cure time and a genuine path back to stock if you change your mind. A side sprayer works exactly the same way mechanically, just with a hose to disconnect instead of a bottle.

Drilling stainless, composite and granite — three different jobs

If nothing on the sink is spare, the faucet needs a new hole, and the correct approach changes completely with the material. Getting this wrong on stone is the expensive version of this mistake; getting it wrong on a composite sink bowl is the common one.

Stainless steel

The straightforward case. Centre-punch the spot so the bit can't wander, lay painter's tape over the area for grip and to stop scratching, and use a step (unibit) drill bit at low speed with steady, even pressure and a few drops of cutting oil on the bit as it works. Let the bit do the cutting — leaning on it work-hardens the steel and dulls the edge faster than the hole itself wears it out. Deburr the underside of the hole with a file or a deburring tool afterward so a sharp edge doesn't chew into the faucet's rubber washer over time. It's a noisy five minutes, not a difficult one.

Composite sink material

Granite-composite, quartz-composite and solid-surface sink bowls are a different material entirely — a resin-bound aggregate that chips and cracks under the kind of side load a step bit applies happily to steel. Use a hole saw sized for the faucet shank rather than a step bit, run it at a slower speed than you would on metal, and back the underside of the drilling area with a scrap block of wood clamped in place to support the material and stop blow-out as the saw breaks through. Keep the saw moving and let it cut on its own weight; forcing it is what cracks composite. Mask the area with tape first, both to mark your centre point and to reduce surface scuffing.

Granite or quartz countertop

This is the job worth pausing on. Natural stone and engineered quartz need a diamond-tipped hole saw run with constant water cooling — dry diamond bits overheat and either glaze over or shatter the stone around the hole. Start the bit at a shallow angle to score a guide groove, then bring it upright once the groove is established; going in straight from a standing start is the single most common way this cracks a slab. Keep the water flowing the entire time and let the diamond grit do the work at a slow, steady feed.

Unless you've done this before, this is the one step worth paying a countertop fabricator or plumber to do. A cracked slab is a four-figure repair that no faucet-hole project justifies, and most fabricators will drill a single hole in an installed counter for a modest call-out fee. If you'd rather not touch the stone at all, a countertop RO unit that draws from a reservoir needs no hole whatsoever.
Air gap or not, and what the code says

An RO system's drain line carries reject water to your waste pipe, and plumbing code in a lot of jurisdictions treats that connection as a backflow risk worth guarding against. There are two accepted ways to guard against it, and they use two different faucets.

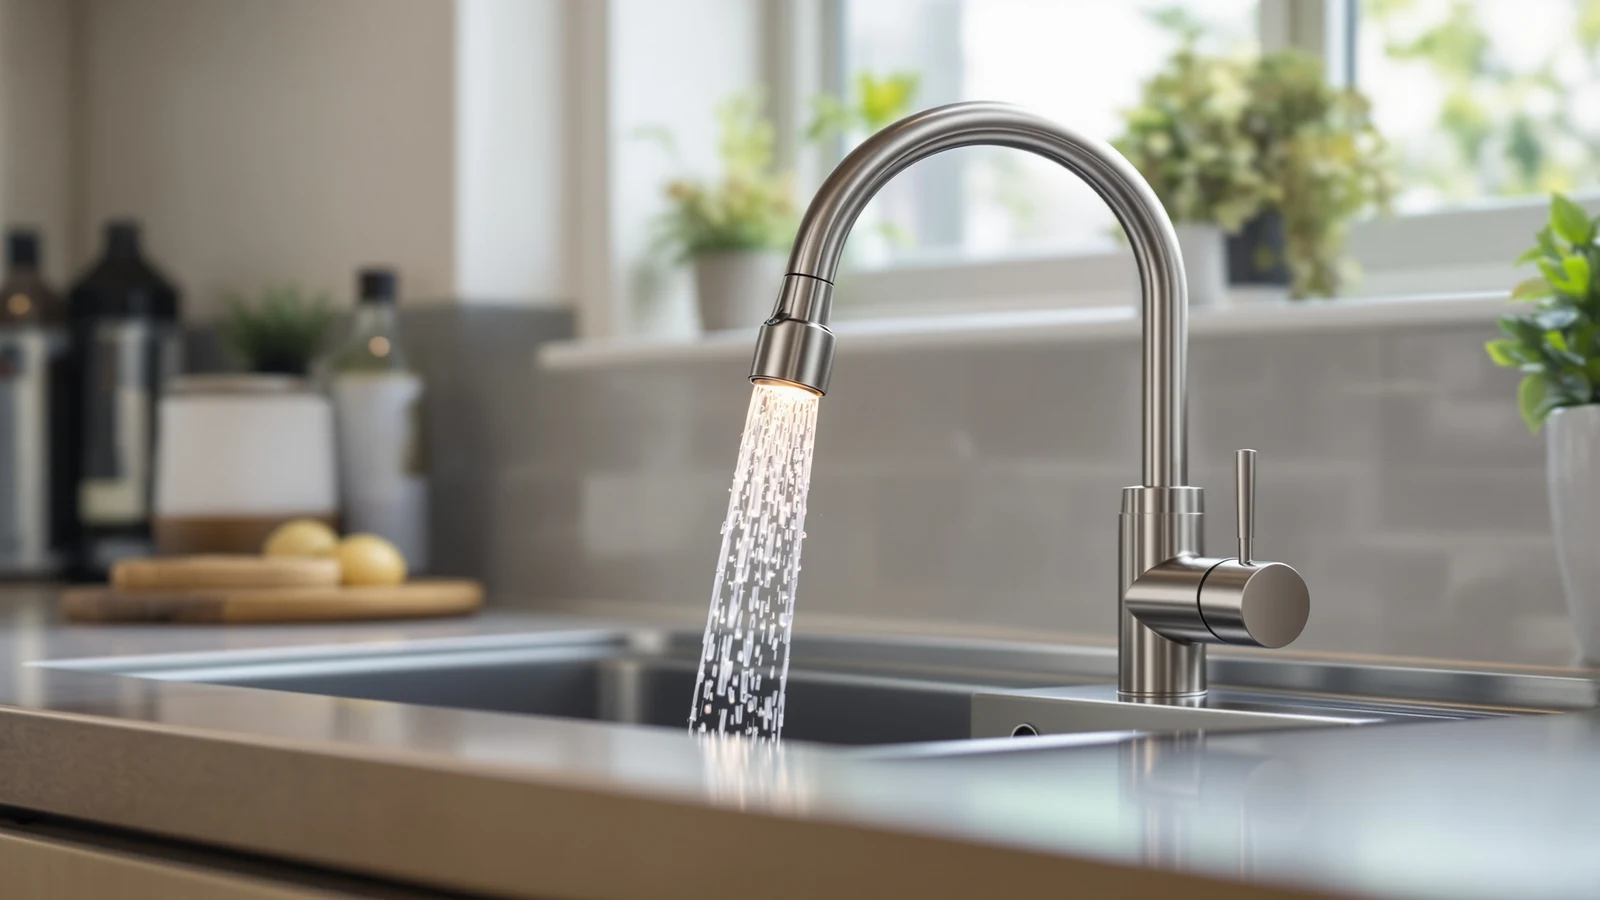
An air-gap faucet has three tubes running up through its base instead of two — supply and a physical break in the drain line that vents to open air inside the faucet body, so waste water can never be siphoned backward into the drinking-water line. It needs a slightly larger faucet hole to carry the third tube, and it drains with an audible gurgle that catches new owners off guard the first few times.

A standard single-hole faucet paired with a high loop — the drain tubing routed up and over, above the drain saddle, before running back down to the waste line — relies on gravity and a physical loop instead of an open-air gap, and it's quieter and simpler to install. Many jurisdictions accept a high loop as satisfying the same backflow-prevention intent an air gap serves, but not all of them do, and this is genuinely local: check your city or county plumbing code before you commit to a hole size and a faucet style.

None of the three systems below specify an air-gap faucet in the specifications we have on file, so treat them as standard-faucet installs and confirm the current listing, or budget for a separate air-gap fitting, if your code requires one. Decide this before you drill: an air-gap faucet's third tube wants a hole on the larger end of the standard range, and re-drilling a stone counter to enlarge one later is not a repeat performance you want.

Sealing the collar so it never weeps

The new faucet's deck plate or escutcheon sits on a rubber or foam washer that does most of the sealing work by itself — but the seal between that washer, the counter surface and the hole edge is exactly where a slow, unnoticed drip likes to start, especially on a hole you've just cut yourself rather than one machined at the factory.

  • On stainless or composite sinks, a bead of plumber's putty under the base plate, laid in a continuous ring with no gaps, backs up the rubber washer and fills any minor unevenness left by the drilling. Wipe away the squeeze-out around the edge once the nut is tightened.
  • On granite, quartz or any natural or engineered stone, skip the putty. Oil-based putty can leave a permanent stain on porous or lightly sealed stone, sometimes not visible until weeks later. Use a clear, stone-safe silicone sealant instead, applied thinly under the base plate.
  • Snug, then a small nudge — never full torque. The nut under the deck plate is compressing a washer, not tightening a wheel bolt. Overtightening on a fresh hole is a common way to crack the very edge you just cut carefully.
  • Test before you trust it. Leave a folded paper towel under the base plate for the first week. Paper records a seep too small to see or feel; a dry towel after a week of normal use is the real pass mark.

If a collar does start to weep months later, the fix is almost never more torque — it's backing the nut off, cleaning the old sealant away completely, and re-sealing with a fresh, continuous bead. A properly bedded collar on a correctly sized hole should not need attention again for years.

The picks

Three systems worth the hole

Whichever hole you end up with, it's feeding one of these. All three ship as complete 5-stage under-sink systems with their own faucet, so the drilling and sealing work above is the one-time cost of the whole setup — not a recurring one. Prices move on Amazon; confirm the live price before buying.

SystemStagesOutputPrice
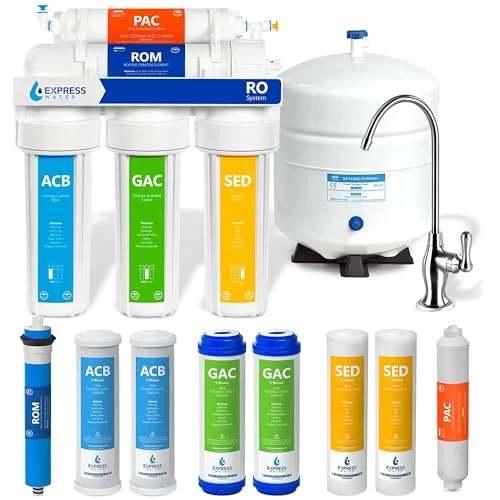
Express Water RO5DX5-Stage50 GPD$179.99Price
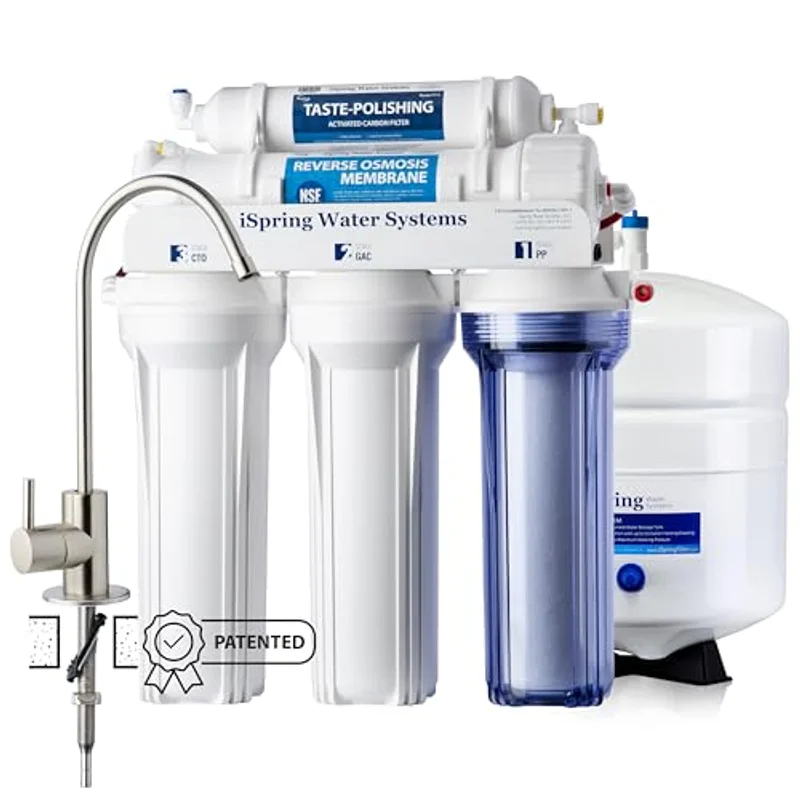
iSpring RCC7-BN5-Stage75 GPD$219.96Price
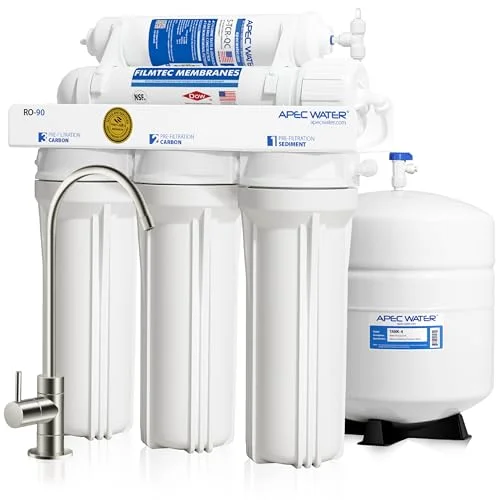
APEC Water RO-905-Stage90 GPD$219.99Price
01Easiest faucet fit

iSpring RCC7-BN

A top-mounted fastener, useful right after a fresh hole
NSF Certified · 75 GPD · 5-Stage · brushed nickel faucet

iSpring lists this as NSF Certified with a patented top-mounted faucet design built specifically for easier installation, and that detail matters most exactly when you've just cut your own hole: the fastener tightens from above the counter instead of asking you to start a nut blind on a shank you can't see from below. On a composite bowl or a stone counter where you're already working carefully around a fresh edge, not having to also work upside-down under the sink is worth something. It ships in brushed nickel.

iSpring RCC7-BN NSF Certified 5-stage reverse osmosis system with brushed nickel top-mounted faucet
$219.96
75 GPD · Brushed nickelCheck price →
02Highest output

APEC Water RO-90

The most output of the three, in chrome
90 GPD · 5-Stage · chrome finish

The APEC RO-90 is rated for 90 gallons a day, the highest output of the three systems here, in a standard 5-stage layout with a chrome-finished faucet. If your household runs the RO line to more than just drinking water — filling a kettle, a coffee machine or a pet bowl repeatedly through the day — the higher rated output is the practical reason to choose this one over a lower-GPD system, independent of which hole you end up drilling for it.

APEC Water RO-90 5-stage under sink reverse osmosis system with chrome faucet
$219.99
90 GPD · ChromeCheck price →
03Lowest price

Express Water RO5DX

The cheapest way into a complete 5-stage system
50 GPD · 5-Stage under-sink

At $179.99 the RO5DX is the least expensive of the three, and it's still a complete 5-stage under-sink system with its own dedicated faucet — the same drilling and sealing job as the pricier two, for less up front. Its rated output of 50 gallons a day is the lowest of the three here, which is worth weighing against the APEC RO-90 if you expect heavy daily draw, but for a typical drinking-and-cooking-water household it's a straightforward, complete way to get water to a faucet you're about to install.

Express Water RO5DX 5-stage under sink reverse osmosis system
$179.99
50 GPD · 5-StageCheck price →

All three are conventional tank systems rather than tankless units, which is worth knowing before you commit cabinet space alongside the faucet hole — our guide to tankless systems covers the alternative if a pressure tank won't fit. And because every RO system sends a portion of the water it processes down the drain rather than through the faucet, it's worth understanding what that waste ratio means before you decide how much output you actually need.

Two mistakes that turn a good hole into a bad one

Drilling before deciding on the faucet. Faucet shank diameters and base-plate footprints vary enough between manufacturers that a hole sized for one faucet isn't guaranteed to suit another. Buy the system, or at least confirm the faucet's hole requirement on its current listing, before the drill touches the counter — especially on stone, where a second attempt means a second hole or a larger one.

Skipping the deburr or the seal step to save ten minutes. A sharp edge left on a freshly cut hole works on the rubber washer every time the faucet is nudged, the same slow-neglect pattern that leaves a membrane running past its schedule because nobody was watching for the early signs. Ten extra minutes with a file and the right sealant, done once, is the difference between a faucet that lasts as long as the system and one that needs revisiting in a year.

FAQ

Common questions

Do I have to drill a new hole for an RO faucet?

Often not. Most kitchen sinks have at least one spare hole occupied by a soap dispenser, a side sprayer, a garbage disposal air switch or a blank knockout cap under the main faucet's deck plate. Check all of those before assuming you need to drill — a spare hole turns this into a twenty-minute swap instead of a drilling project.

Can I use the soap dispenser hole for my RO faucet?

Yes, and it's usually the easiest fixture to sacrifice. Unscrew the plastic locknut from underneath, lift the pump assembly out through the top, and keep the parts — the swap is fully reversible, and a cheap blanking cap will cover the hole again later if you ever want the dispenser back.

Do I need an air gap faucet for reverse osmosis?

It depends on your local plumbing code. An air-gap faucet physically vents the drain line to open air and needs a slightly larger hole; a standard single-hole faucet paired with a high loop achieves a similar backflow-prevention intent and many jurisdictions accept it, but not all do. Check your local code, or the requirement your permitting office enforces, before you pick a faucet style and drill a hole sized for it.

How do I stop the new faucet from leaking at the base?

Seal the deck plate with plumber's putty on stainless or composite sinks, or a stone-safe silicone sealant on granite and quartz — oil-based putty can stain natural stone. Tighten the mounting nut snug plus a small nudge, never to full torque, since it's compressing a washer rather than a bolt. Leave a folded paper towel under the base for the first week to catch any seep too small to see.

Keep reading

Next, once the faucet's in