Best RO Systems
Home › Guides › Membrane replacement guide
How-to

When to replace an RO membrane (and how to tell)

We're reader-supported: buying through our links may earn us a commission at no additional cost to you. We compare published specifications, certifications and prices — we don't run a testing lab.

A reverse osmosis membrane cartridge being lifted out of its housing beside an open under-sink cabinet

Every reverse osmosis system has one cartridge that is doing a different job from all the others, and it is also the one most owners hesitate to touch. Sediment filters catch grit. Carbon stages strip chlorine and taste. Post-carbon and remineralization stages are a final polish before the faucet. Only the membrane actually performs reverse osmosis: forcing water through a semi-permeable thin-film composite fine enough to reject dissolved solids, not just particles you could see under a microscope. Swap every other cartridge on schedule and skip the membrane, and the system still looks like it's working — clear water, decent flow — while the one job that justified buying an RO system in the first place quietly isn't happening anymore.

That distinction matters because the other stages exist largely to protect the membrane, not to replace what it does. A fresh sediment filter and a fresh carbon block keep chlorine and particulate away from the membrane's surface, which is exactly why changing them on time is the cheapest insurance in the system — but insurance isn't the thing itself. The membrane is rated for total dissolved solids rejection, typically in the low-to-high 90s as a percentage, and that number is what separates reverse osmosis water from the water in the guide on reverse osmosis vs. distilled water. A system running on a fouled membrane can still taste fine, because taste is a carbon-stage story, not a membrane one — which is exactly why taste is the wrong signal to rely on here.

Certification is the other place this distinction gets lost. NSF/ANSI 58 is the standard that actually tests contaminant and TDS reduction performance for a complete system; NSF/ANSI 372 only certifies that the materials are lead-free and says nothing about what gets removed. We go through the difference in detail in NSF 58 vs. NSF 372 vs. WQA, but the short version for this page is: a system's NSF/ANSI 58 rating describes the membrane's performance when it was new, on the manufacturer's test bench. It says nothing about the membrane sitting in your cabinet three years later. That's a question only you can answer, and the next section is how.

The TDS reading that says it's finished

A handheld total dissolved solids meter is the cheapest diagnostic tool for this job, and the raw number it shows you is almost useless on its own. A reading of 40 ppm from your RO faucet could be excellent or mediocre depending entirely on what came out of the cold tap before treatment. The number that actually means something is a ratio: measure your untreated feed water, measure the RO product water, and compute (feed − product) ÷ feed. That percentage is your real-world rejection rate, and it is directly comparable to the manufacturer's published figure — a 75 GPD membrane commonly carries a published rejection figure in the low-to-high 90s under NSF/ANSI 58 test conditions, and a membrane holding near the top of that band is healthy.

Take that baseline reading when the membrane is new, on both sides, and write the numbers on the housing or somewhere you'll actually find them again. Without a starting point, a single reading months later tells you nothing, because you have no idea whether the membrane started at 98% or 91%. Our guide to what the TDS number actually means goes through the meter side of this in more depth if you haven't done the test before.

The finished signal is a rejection rate that has drifted down from that baseline and stays down after you've changed the pre-filters. That last part matters: a clogged sediment stage or exhausted carbon block can also nudge the product-water number, so change those first and re-measure before you conclude the membrane itself is the problem. If the ratio is still meaningfully below where it started — a membrane that opened at 96% and is now reading in the low 80s, say — the membrane has lost rejection capacity that a new pre-filter set won't get back. Rising feed-water TDS will also lift the product-water number without the membrane doing anything wrong, which is exactly why the ratio, not the raw reading, is the number to trust.

Why calendar schedules mislead

Membrane life is commonly described as two to three years, and that figure is real, but it's a household-and-water-quality average dressed up as a fixed interval. A membrane doesn't wear out on a clock; it fouls based on how much water has passed through it and what was in that water. A couple who drinks RO water and little else can be well past three years on the same membrane that a family of five, filling a coffee maker, an ice bin and a pet bowl from the same line, might need to replace in eighteen months. Both households are using the system exactly as intended. Only one of them should be changing the membrane on the three-year mark.

Feed water quality moves the number in both directions independent of usage volume. Hard water accelerates scale formation on the membrane surface, which is a mechanical fouling problem separate from ordinary rejection decline. Well water, an old service line, or a stretch where the municipal utility has been doing nearby work can load the upstream sediment stage — and eventually the membrane — far faster than treated water on a stable line. None of that shows up on a box that says "2–3 years," because the box is describing an assumed household on assumed water, and yours is neither.

Treat the printed interval as an outer ceiling, not a countdown you can set and forget. The TDS ratio from the previous section is the actual instrument; the calendar is a reminder to go check it, not a substitute for checking it. This is the same logic that applies to drain ratios and running costs elsewhere in an RO system — the number on the spec sheet describes a test condition, and your real-world result depends on your own water and your own habits.
What shortens a membrane's life fastest

Four things do most of the damage, and three of them are preventable with cartridges that cost far less than the membrane itself.

  • Chlorine reaching the membrane. Free chlorine attacks a thin-film composite membrane directly, degrading the material rather than just clogging it. The carbon stages upstream exist specifically to strip chlorine before it gets that far — an exhausted carbon block isn't just a taste problem, it's the single fastest way to shorten membrane life, and it happens silently, since carbon doesn't clog visibly the way a sediment filter does.
  • A neglected sediment stage. Once a sediment filter is loaded past its capacity, particulate starts passing through to the stages behind it, including the membrane surface. On systems with a transparent first housing, a filter that's gone from white to grey-brown is telling you this before anything else will.
  • Feed pressure below spec. RO membranes are rated to perform at a manufacturer-specified inlet pressure range. Running one on chronically low household pressure doesn't just reduce output — it changes the ratio of water that gets pushed through the membrane versus rejected to drain, which stresses the membrane differently than it was designed for.
  • Long idle stretches without sanitizing. A system that sits unused for weeks, especially after a housing has been opened without a sanitizing step, gives bacteria a stagnant, dark, pressurized environment to grow in. Our guide to sanitizing and maintaining an RO system covers the step people skip most often, and it's genuinely a few dollars of food-grade sanitizer and ten extra minutes at change time.

Notice what these four have in common: none of them are about the membrane part number, brand, or price. They're all upstream maintenance and household conditions. A cheap membrane looked after well will usually outlast an expensive one running behind an exhausted pre-filter.

Changing one without flooding the cabinet

The membrane housing sits under real line pressure, and the single most common mistake is opening it the way you'd open a jar — fast, and without relieving that pressure first. Here's the order that keeps the water in the housing and not on the cabinet floor.

  1. Shut off the feed valve. This is the small valve on the cold-water line feeding the system, usually where the original install tapped in. Turn it fully closed before you touch anything else.
  2. Open the RO faucet and leave it open. Let it run until it stops — this bleeds the pressure out of the lines and the tank, and it's your confirmation that the feed is actually off. If water keeps flowing steadily instead of trickling out, the feed valve isn't fully closed.
  3. Stage towels and a shallow bowl under the housing. Even a fully depressurized housing holds a cupful or two of standing water in the canister. A bowl under the housing catches it; towels catch what the bowl misses.
  4. Unscrew the housing slowly, not all at once. Loosen it a partial turn and pause — if there's still residual pressure, this is where it shows itself as a hiss or a trickle rather than a sudden release once the housing is most of the way off.
  5. Note the orientation before you pull the old membrane. Membranes are directional, and most housings and O-rings only go back together one way. A phone photo before you disturb anything saves a confused ten minutes later.
  6. Seat the new membrane and check the O-ring. A twisted or dry O-ring is the most common cause of a housing that weeps after reassembly. A light film of the manufacturer-approved lubricant, if one is specified, helps it seat evenly.
  7. Reopen the feed valve gradually, not all the way at once. A slow quarter-turn open lets you watch the housing for the first few seconds of pressure before committing to full flow.
  8. Check every joint you touched before you walk away. Run a dry paper towel around the housing seam and the fittings; a damp towel a minute later means a slow weep, not a false alarm.
  9. Flush before you drink it. A newly installed membrane needs its first tank or two of product water run to drain rather than to the glass — follow the specific flush guidance that came with the membrane you bought.

If your system uses a pressure tank rather than a tankless design, the tank itself holds its own bladder charge independent of the membrane housing, and it's worth understanding separately — we cover it in the RO storage tank guide. Tankless systems skip that step entirely but still need the feed-valve-and-bleed sequence above; see our roundup of the best tankless reverse osmosis systems if you're deciding between the two layouts for a future purchase.

The picks

Three ways to buy the replacement

What you need depends on whether your system takes a standalone membrane or a bundled set. These are the three replacement products we could source with a complete, verifiable listing.

01Membrane only

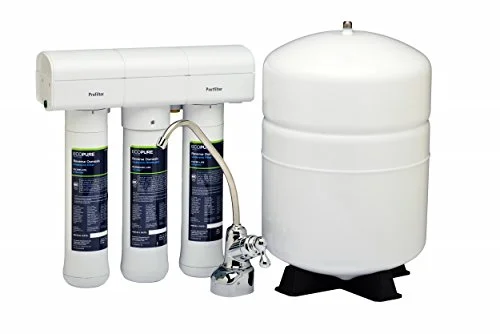
EcoPure ECOROM Reverse Osmosis Membrane Replacement

If your system just needs the membrane, not the whole set
NSF-certified Stage 2 filter · Fits ECOP30 & select Kenmore and Brita RO systems · 1–3 year life

This is a standalone membrane, not a bundled filter set — the listing describes it as an NSF-certified stage 2 filter that reduces TDS, lead, chlorine and more, with a rated life of one to three years, and the manufacturer positions it as an easy change. It's built to fit the ECOP30 and select Kenmore and Brita reverse osmosis systems specifically; check your model against the listing before buying, since compatibility for a membrane-only replacement is exactly the spec you can't afford to guess on.

EcoPure ECOROM reverse osmosis membrane replacement cartridge
$69.99
Membrane onlyCheck price →
02Membrane + the stages around it

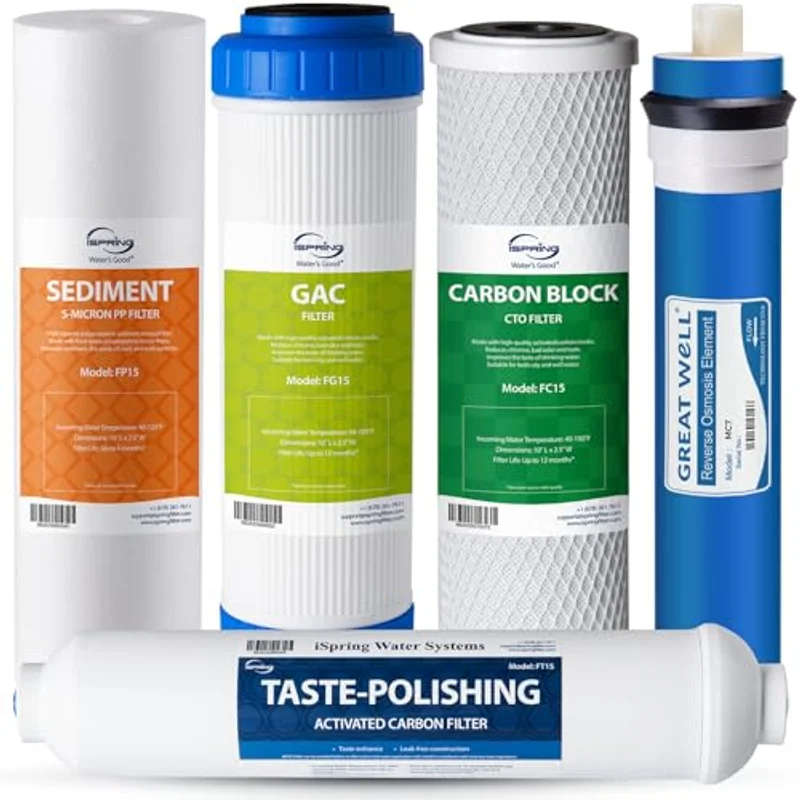
iSpring F5-75 Reverse Osmosis Filter Replacement Pack

When the membrane and the pre-filters are due around the same time
75 GPD RO membrane included · Fits 5-stage reverse osmosis systems · 5 count, pack of 1

A five-cartridge set built for 5-stage systems, with the 75 GPD membrane bundled in alongside the sediment, carbon and post-carbon stages rather than sold separately. That bundling makes it the practical choice if the membrane and the surrounding filters are landing in the same maintenance window — you replace the whole chain that protects and performs the membrane's job in one order instead of two.

iSpring F5-75 reverse osmosis filter replacement pack with 75 GPD membrane
$55.09
5-stage setCheck price →
03A full year, 50 GPD systems

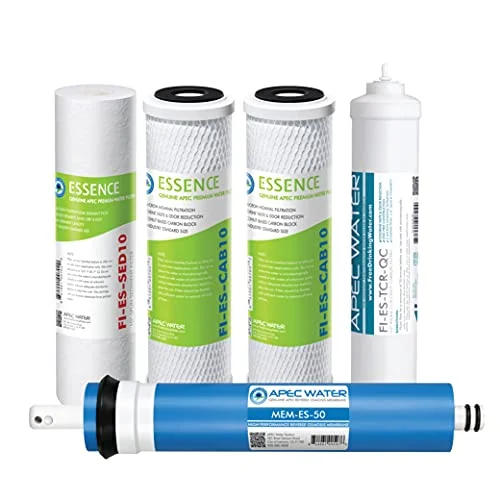
APEC Water FILTER-MAX-ES50 Reverse Osmosis Filter Replacement Set

A year of maintenance in one order, for 50 GPD systems
50 GPD · 1 Year Set

APEC sizes this set for its 50 GPD systems and packages it as a full year's supply, which is convenient if you'd rather place one order than track individual cartridge dates. The listing doesn't specify whether the membrane itself is bundled into the set or sold as a separate part number — confirm that on the current listing before ordering if the membrane is specifically what you're after, rather than assuming.

APEC Water FILTER-MAX-ES50 reverse osmosis filter replacement set
$79.99
1-year set · 50 GPDCheck price →
FAQ

Common questions

How do I know my RO membrane needs replacing?

Measure the TDS rejection ratio — (feed minus product) divided by feed — rather than reading the product-water number alone, and compare it against a baseline you took when the membrane was new. A ratio that has drifted down and stays down after you've replaced the pre-filters is the reliable signal that the membrane itself, not an upstream cartridge, has lost rejection capacity.

Does a lower TDS rejection always mean the membrane is bad?

Not automatically. A clogged sediment filter or exhausted carbon block can also move the product-water reading, and rising feed-water TDS lifts the product number without the membrane doing anything wrong. Change the pre-filters first and re-measure the ratio before concluding the membrane needs replacing.

How often should I replace an RO membrane?

Typically two to three years, but that figure describes an assumed household on assumed water quality, not your specific system. Households that use more RO water, or that are on hard or sediment-heavy supply, can wear one out well inside that window; light two-person households on treated municipal water can run well past it. Use the TDS ratio to find your real interval instead of relying on the printed range.

Can I replace just the membrane without changing all the filters?

Yes, on systems that sell the membrane as a standalone part — the EcoPure ECOROM is built for exactly that, fitting the ECOP30 and select Kenmore and Brita systems. Bundled sets like the iSpring F5-75 replace the membrane alongside the surrounding sediment and carbon stages in one pack, which is convenient when several cartridges are due at once but isn't required if only the membrane has failed its TDS check.

Keep reading

Next, if you're maintaining a system